 Save to Pinterest
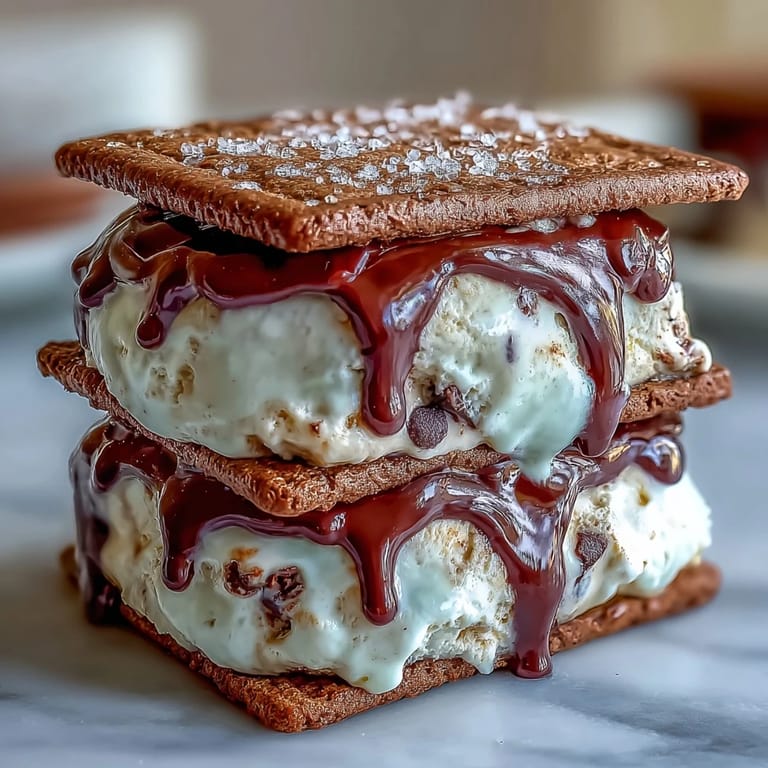
 There's something magical about that moment when a cold espresso-spiked cookie hits your tongue right before the vanilla bean ice cream melts through the middle. My friend Sarah brought these to a summer dinner party, and I watched everyone's eyes light up in that exact same order—confusion, then delight, then the immediate question of how she'd made them. Turns out, she'd been daydreaming about recreating her favorite Starbucks order in sandwich form, and somehow it worked beautifully.
I made these last August during an unexpectedly hot week, and my kitchen smelled like rich cocoa and bitter espresso for hours. My neighbor stopped by to borrow sugar and ended up staying for one, sitting on my kitchen counter with chocolate smudged on her chin, asking if I'd ever considered selling them. That one moment—her genuine joy over something I'd made—reminded me why I love baking in the first place.
Ingredients
- Unsalted butter: Use the good stuff if you can, because it's the foundation of these cookies' rich flavor and that perfect tender crumb.
- Brown sugar and granulated sugar: The combination gives you molasses depth plus a touch of brightness.
- Large eggs: Room temperature eggs blend more smoothly and create a better texture than cold ones straight from the fridge.
- Vanilla extract: Don't skip this even though it might seem repetitive with the vanilla bean ice cream—it adds a subtle note to the cookies themselves.
- All-purpose flour: Measure by weight if you have a scale for the most consistent results.
- Unsweetened cocoa powder: This deepens the flavor without adding sweetness, letting the espresso and vanilla shine through.
- Instant espresso powder: This is non-negotiable for that authentic frappuccino bite; regular coffee won't give you the same intensity.
- Baking soda: Works with the acidic cocoa to help the cookies spread and brown evenly.
- Salt: A small pinch in everything amplifies all the other flavors without making anything taste salty.
- Heavy cream and whole milk: The ratio matters because heavy cream alone would be too rich and milk alone too thin for perfect ice cream texture.
- Granulated sugar: For the ice cream base, this dissolves cleanly without any grittiness.
- Vanilla bean: If you can find real beans, split them and scrape out those tiny black seeds—they're what make this ice cream look and taste special.
Tired of Takeout? 🥡
Get 10 meals you can make faster than delivery arrives. Seriously.
One email. No spam. Unsubscribe anytime.
Instructions
- Start your ice cream base early:
- Combine your milk, sugar, vanilla bean seeds and pod, and salt in a saucepan and heat gently until everything dissolves and steam rises from the surface. You'll know it's ready when you can run your finger along the back of a spoon and it leaves a clear trail.
- Cool it down completely:
- Stir in your heavy cream once you remove it from heat, then refrigerate for at least two hours—this step isn't just about temperature, it's about letting the vanilla flavor develop and deepen. The patience here pays off in creaminess.
- Churn to creamy perfection:
- Follow your ice cream maker's instructions, which usually takes about twenty to thirty minutes of churning. Once it reaches soft-serve consistency, spread it into your parchment-lined pan to about an inch thick and freeze until solid, at least two more hours.
- Mix your dry cookie ingredients:
- In one bowl, whisk together flour, cocoa powder, espresso powder, baking soda, and salt—this prevents lumps and makes sure the espresso distributes evenly throughout.
- Cream butter and sugars until fluffy:
- Beat them together for about three minutes until the mixture is pale and almost light in texture, then beat in eggs one at a time. Add your vanilla extract last.
- Combine wet and dry with care:
- Fold the dry ingredients into the wet mixture until just combined—overmixing develops gluten and makes cookies tough instead of tender. You want some streaks of flour visible still.
- Roll and cut your cookies:
- Divide the dough in half and roll each piece between two sheets of parchment paper to exactly one-quarter inch thick. Using your three-inch cutter, you'll get sixteen perfect rounds—one more than you technically need, which is always nice.
- Bake until just set:
- They should look barely done around the edges and still slightly soft in the center when you pull them out at ten to twelve minutes. They'll continue cooking on the hot pan and firm up as they cool.
- Assemble your sandwiches:
- Once everything is completely cool and firm, cut your ice cream slab using the same cutter, place a round between two cookies, and press gently. The warmth of your hands will soften the ice cream just enough to stick the cookies together.
- Final freeze before serving:
- Wrap each sandwich in parchment paper and freeze for at least one hour so everything sets and stays together when you bite into it.
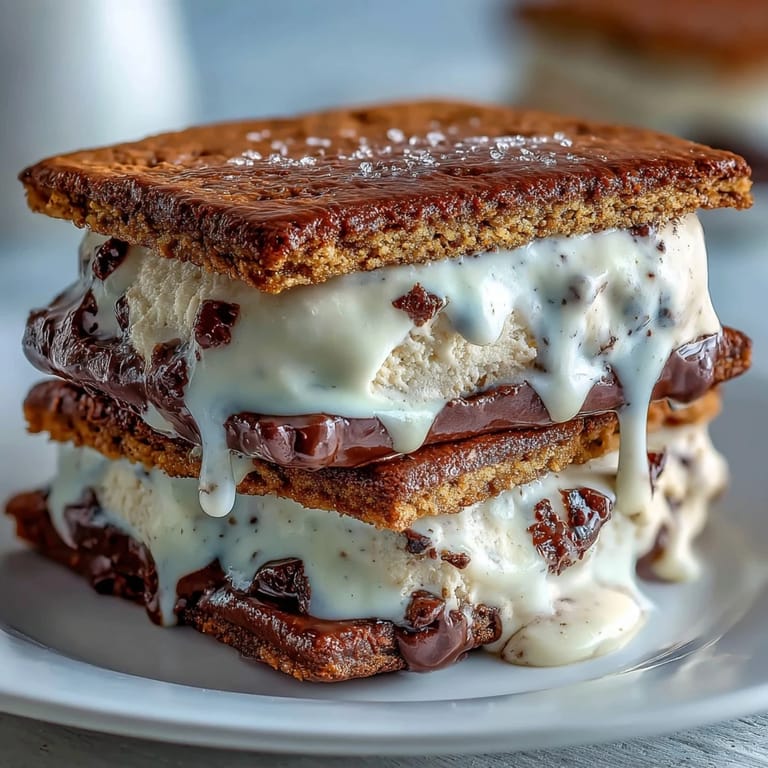
 Save to Pinterest
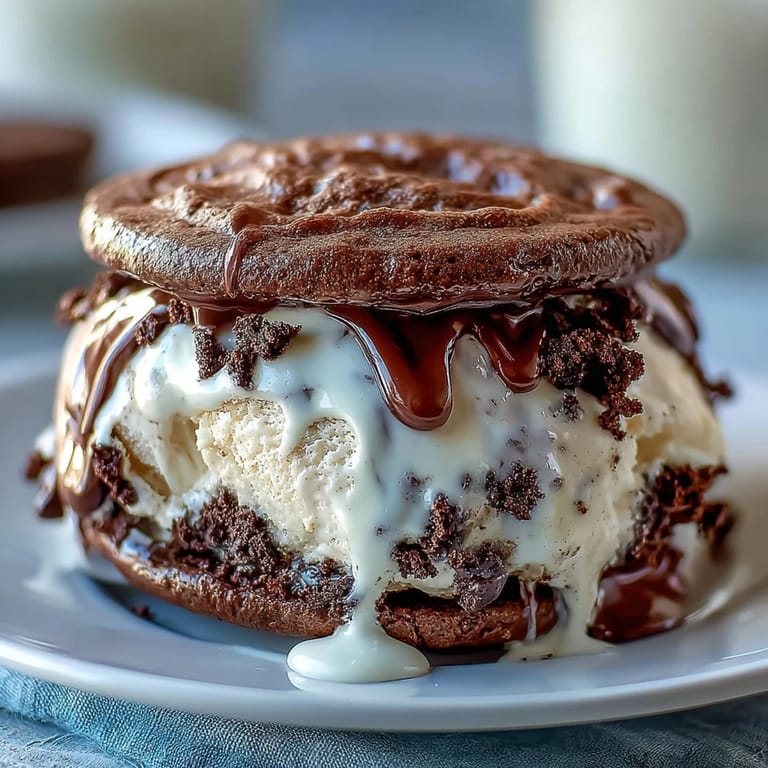
 My cousin made these for her daughter's eighth birthday party, and instead of a traditional cake, she served them in a little cardboard cone like an ice cream truck treat. The kids went absolutely wild, and honestly, the adults weren't far behind—there's something about eating with your hands that makes dessert feel like an adventure instead of just the final course.
The Secret to Perfect Cookie Texture
The magic happens when you don't overbake these cookies—they should still feel slightly soft in the very center when you pull them out of the oven. I learned this the hard way after my first batch came out too crispy, and they couldn't hold the ice cream filling properly without cracking. Now I set a timer for ten minutes, check them, and pull them out the moment the edges look set but the middle still jiggles slightly. Those few seconds of carryover cooking while they cool on the rack create the perfect texture.
Why Vanilla Bean Makes All the Difference
Real vanilla beans transform this from a nice dessert into something that feels genuinely luxurious. The tiny black specks aren't just visual appeal—they contain all those complex flavor compounds that vanilla extract can only hint at. If you can't find vanilla beans or they're too expensive, vanilla bean paste is the next best thing and gives you almost the same effect without having to hunt for the seeds. One time I made a batch with just extract and thought it was fine, but side by side with one made from real beans, the difference was impossible to ignore.
Make It Your Own
Once you've made these once, you'll start seeing endless variations. My neighbor rolled the sandwich edges in mini chocolate chips before the final freeze, creating this gorgeous speckled border and an unexpected crunch. Another friend used salted caramel ice cream instead of vanilla and said it was like eating the fancier cousin of these sandwiches. The cookie base is so versatile that you could swap in different ice cream flavors or even roll the edges in crushed cookies, sprinkles, or chopped espresso beans for texture.
- Try swapping the vanilla bean ice cream for coffee ice cream if you want even more espresso flavor throughout.
- Roll edges in crushed espresso beans or chocolate chips immediately after assembly for extra crunch and visual appeal.
- Make the cookies and ice cream base separately ahead of time—you can store cookies in an airtight container for three days and ice cream base in the fridge for five days before assembly.
 Save to Pinterest
 There's something deeply satisfying about creating something that tastes like a coffee shop favorite right in your own kitchen, and knowing exactly what went into every single bite. These sandwiches remind you why homemade is worth the effort.
Questions & Answers
- → How do I make the vanilla bean frozen base?
Heat milk, sugar, vanilla bean seeds, and salt until sugar dissolves. Cool, mix in heavy cream, chill, then churn in an ice cream maker or freeze with stirring.
- → What gives the cookies their espresso flavor?
Instant espresso powder is blended with cocoa and flour, infusing the cookies with a rich coffee aroma and taste.
- → Can I prepare these sandwiches ahead of time?
Yes, assemble the frozen base and cookies, then freeze the sandwiches wrapped in parchment for at least an hour before serving.
- → What tools are needed for assembly?
You will need a 3-inch round cutter for shaping cookies and frozen layers, plus baking sheets, a rolling pin, and parchment paper for prep and storage.
- → How can I add extra texture to the sandwiches?
Roll the edges in mini chocolate chips or crushed espresso beans before freezing to add crunch and enhanced flavor.